
Recipes
Chicken Fajitas in 20 Minutes
Prep
8 min
Cook
12 min
Total
20 min
Servings
4
Difficulty
Easy
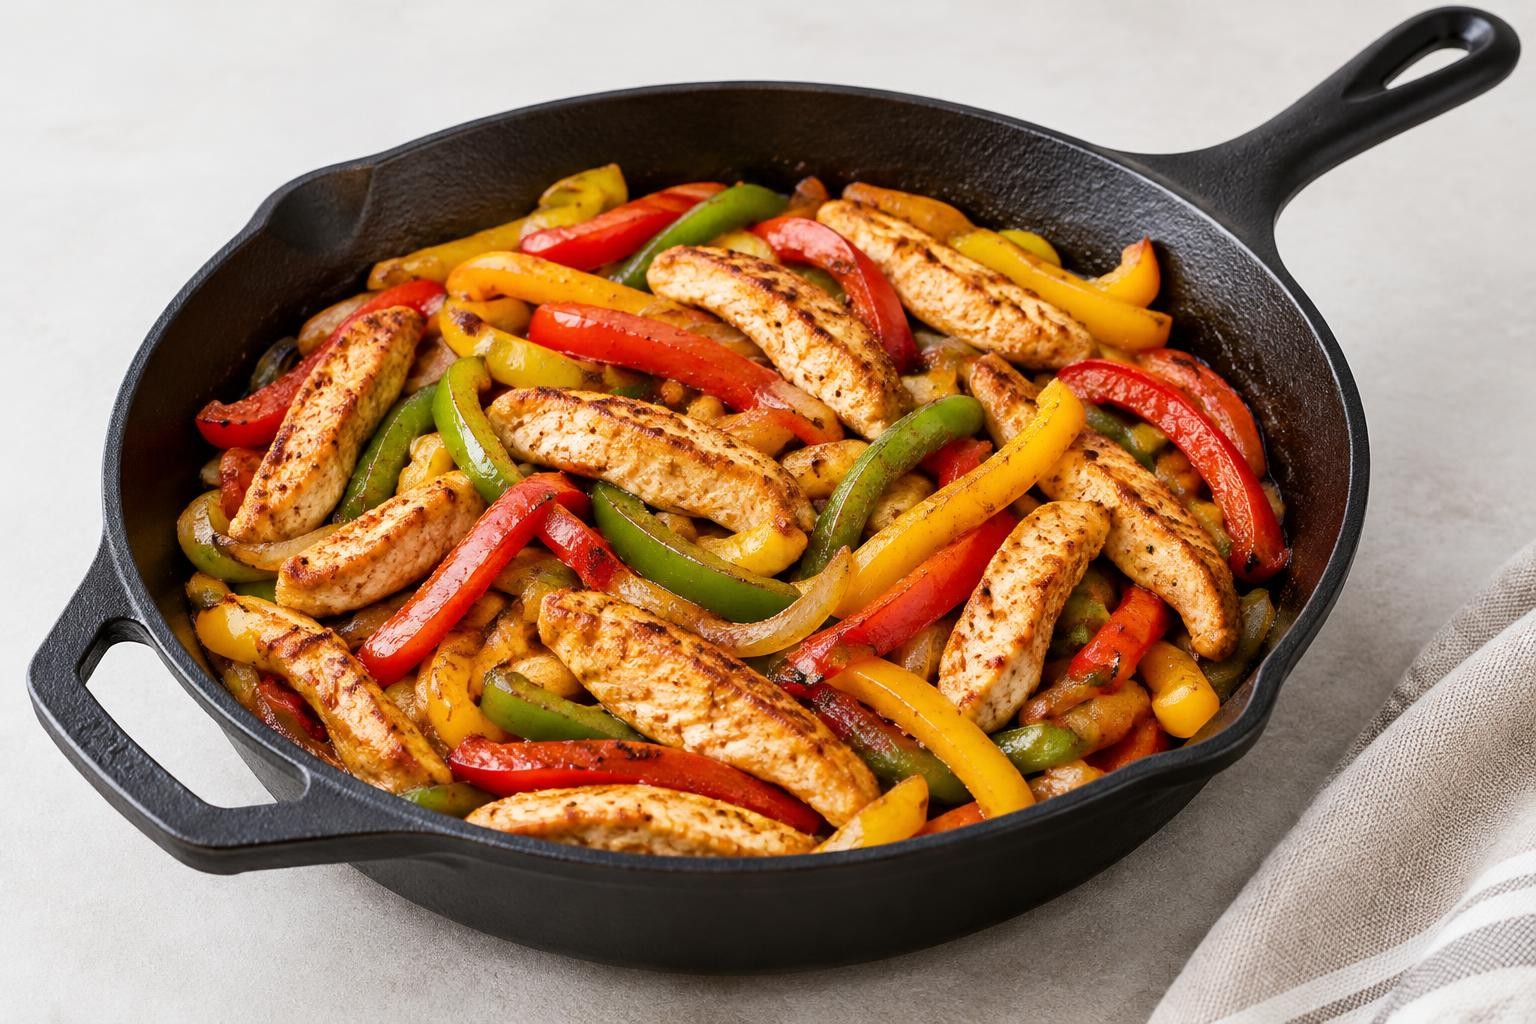
Chicken fajitas are a weeknight dinner built around contrast: warm, pliable tortillas, juicy pieces of chicken and peppers that are tender at the edges but still have a little bite. The seasoning should taste savory and fragrant, with gentle warmth from chili and a squeeze of lime at the end. When everything is cooked properly, you don't need a bottled sauce or a long marinade.
This version uses one large skillet and ingredients that are easy to find. The important technique is to cook the chicken and vegetables in stages, rather than crowding everything into a steaming pile. A wide, hot pan produces the browned edges that give this style of Tex-Mex fajita its characteristic flavor. You can serve the filling in tortillas, over rice, on a salad or with beans.
About the 20-minute promise: allow roughly eight minutes to slice and season everything and twelve minutes for the skillet. That assumes a large 28–30 cm (11–12 in) pan, a ready work surface and relatively thin chicken strips. A small pan, thick pieces or multiple batches will take longer, and food safety takes priority over the clock.
Recipe details
- Prep
- 8 min
- Cook
- 12 min
- Total
- 20 min
- Servings
- 4
- Difficulty
- Easy
- Category
- Recipes
- Diet
- Dairy-free without optional toppings
- Portion size
- one quarter of the chicken and vegetables; tortillas separate
Ingredients
For the chicken and vegetables
For the homemade fajita seasoning
Optional toppings
Method
Get organized
Step 1: Set a large cutting board, knife, mixing bowl, spatula and a wide 28–30 cm (11–12 in) skillet within reach. Starting organized is part of making this a genuinely quick dinner.
Step 2: Slice the chicken against the grain into strips of similar thickness, around 1 cm. Keep the raw poultry separate from vegetables and wash hands, utensils and any contacted surfaces before preparing ready-to-eat toppings.
Step 3: Pat the chicken dry with paper towels. Surface moisture must evaporate before the exterior can brown, so this small step makes an appreciable difference.
Step 4: Core the peppers, remove the seeds and slice the flesh into long strips. Cut the onion into thin wedges; keeping the wedges together helps them brown rather than disintegrate.
Step 5: In a small bowl, stir together cumin, smoked paprika, mild chili seasoning, garlic powder, oregano, salt and black pepper. Mix thoroughly so one bite does not get all the salt or chili.
Step 6: Add the chicken to a bowl with roughly two-thirds of the seasoning mixture and 1 teaspoon of the oil. Toss until every strip is lightly coated. Save the remaining spice mix for the vegetables.
Brown the chicken
Step 7: Heat the empty skillet over medium-high heat for approximately 60–90 seconds. It should be hot enough that a drop of water quickly sizzles and evaporates, but not so hot that oil immediately smokes heavily.
Step 8: Add about 2 teaspoons of oil and swirl to cover the surface. Arrange the chicken in a single layer rather than piling it up.
Step 9: Let the chicken sear without moving for about 2 minutes. This contact time encourages savory browned patches instead of a pale, boiled appearance.
Step 10: Turn the pieces and cook for another 2–3 minutes, moving only as necessary. Exact timing depends on thickness, pan temperature and starting temperature of the meat.
Step 11: Check the thickest piece with a food thermometer. Chicken must reach **74°C / 165°F** at its center. If it has not reached that temperature, continue cooking; do not use the 20-minute target to rush this step.
Step 12: Transfer the chicken to a clean plate. Do not put cooked chicken back on the plate or board used for raw poultry unless it has been thoroughly washed.
Cook the peppers and onion
Step 13: Return the skillet to medium-high heat. Add the remaining oil and the sliced onion; stir for roughly 1 minute until the sharp raw smell begins to mellow.
Step 14: Add the pepper strips and spread them across the pan. Leave them undisturbed for 60–90 seconds so some edges can take on color.
Step 15: Toss and cook for another 2–3 minutes, aiming for peppers that bend but still hold their shape. A little char is welcome; completely soft, watery peppers are not the goal.
Step 16: Scatter over the reserved seasoning and toss for about 20–30 seconds. Brief contact with the warm oil helps awaken the spices, but avoid allowing paprika or chili to burn.
Step 17: If browned spices stick hard to the bottom, add up to 2 tablespoons of water and scrape gently with the spatula. The resulting glaze should lightly coat the vegetables, not turn into a soup.
Finish and serve
Step 18: Return the cooked chicken and any juices from its clean resting plate to the skillet. Toss together for about 1 minute, just until everything is piping hot.
Step 19: Turn off the heat and squeeze over approximately half the lime. Taste one pepper and a piece of chicken, then add more lime or a little salt only if needed. Citrus should brighten, not overpower, the spice mixture.
Step 20: Warm the tortillas separately in a dry skillet for roughly 15–20 seconds per side, or follow their package directions. Bring the skillet to the table and let everyone build their own fajitas with cilantro, avocado, yogurt or salsa.
Tips
- Choose a wide skillet. A 28–30 cm pan is ideal for this amount. With a smaller pan, brown the chicken in batches and accept that the recipe will take longer.
- Keep the strips even. A mix of paper-thin and very thick chicken pieces is a recipe for dry edges and an undercooked center. Aim for similar thickness even if the strips vary in length.
- Don't wash raw chicken. Washing can splash bacteria around the sink. Patting it dry with disposable paper is enough.
- Use the thermometer, not the color. Browning outside does not prove the thickest piece is fully cooked. Check 74°C / 165°F in the center.
- Control the heat, not just the timer. Reduce to medium if spices scorch or the pan smokes heavily. Raise it slightly if the vegetables release water and barely sizzle.
- Avoid a crowded pan. Visible steam and a pool of liquid signal overcrowding. Work in two batches if necessary; stronger browning beats an unrealistic stopwatch target.
- Add lime at the end. Fresh lime gives a brighter result than cooking the juice with the chicken from the beginning.
- Warm tortillas last. Cold tortillas crack more easily and make the filling cool quickly. Keep warm tortillas covered in a clean kitchen towel until serving.
- Season to your chili blend. Spice strength varies by country and brand. Taste the seasoning before adding extra heat, especially when cooking for children.
Variations
Chicken thighs instead of breast
Use 500 g boneless, skinless thigh meat cut into thin strips. Thighs tolerate a little more cooking and remain juicy, but may require a few additional minutes. The same safe internal temperature of 74°C / 165°F applies.
Smokier fajitas
Increase smoked paprika to 1½ teaspoons and finish with a very small pinch of chipotle powder if you like smoke and heat. Begin cautiously: chipotle blends can vary widely in intensity.
Vegetarian version
Replace chicken with 400 g drained, well-pressed extra-firm tofu or sliced mushrooms. Tofu should be patted dry and browned before the vegetables. Mushrooms release water, so cook them with room to evaporate moisture.
More vegetables
Add thin zucchini strips or sliced mushrooms, but reduce some of the bell pepper to avoid crowding the pan. The main flavor is best when at least part of the vegetables can brown rather than steam.
Lower-heat family version
Omit hot chili entirely and use smoked paprika, cumin and oregano. Serve a hot sauce on the side so adults can adjust the spice without changing everyone's portion.
Why this method works
Three things matter more than a complicated marinade: uniform cuts, dry surfaces and adequate pan space. Pieces that are similarly sized cook at nearly the same rate. Excess liquid cools the pan and prevents browning. Cooking the chicken first gives you control over its doneness, while cooking the vegetables second keeps them from becoming limp.
A combination of cumin, smoked paprika and mild chili seasoning contributes warmth without requiring a ready-made spice mix. Adding lime after the pan comes off the heat keeps the finish lively; boiling citrus juice for several minutes can flatten its fresh taste.
How to serve chicken fajitas
For classic-style fajitas, put the chicken and vegetables in the center of the table and offer warm tortillas, lime wedges and two or three toppings. An avocado mash adds richness, a tomato salsa contributes acidity, and plain yogurt or sour cream softens the chili. You do not need all three for a satisfying meal.
For a bowl, spoon the fajita mixture over cooked rice or quinoa and add black beans and shredded lettuce. For a lighter plate, serve over crunchy greens with a little olive oil and lime. Because the skillet filling is seasoned separately, it works well with different accompaniments.
Storage and reheating
Refrigerate: cool leftovers promptly and transfer them to a shallow, airtight container. Refrigerate within 2 hours of cooking (within 1 hour in very hot conditions above 32°C / 90°F). Use refrigerated cooked chicken within 3–4 days, keeping it at 4°C / 40°F or below. Store tortillas, lettuce and cold toppings separately.
Reheat: warm the filling in a skillet over medium heat with a spoonful of water until heated through to 74°C / 165°F. Heat only what you plan to eat; repeated cooling and reheating affects texture and increases handling.
Freeze: the cooked chicken and peppers can be frozen in meal-size portions, ideally for best eating quality within 2–3 months. The peppers will become softer after thawing. Thaw in the refrigerator, not on the counter.
Troubleshooting
My chicken is dry
The pieces were probably too thin, cooked too long or reheated repeatedly. Cut even strips and remove them from the skillet when they reach 74°C / 165°F. Next time, use thigh meat if you prefer a more forgiving cut.
Everything is watery
The pan was crowded or not hot enough. Keep the ingredients in a loose layer and cook them in stages. Adding more spice will not replace the flavor of browning.
The seasoning tastes burnt
Paprika and chili powders scorch quickly on a very hot, dry surface. Add the reserved spices near the end of cooking the vegetables and loosen the pan with a little water when necessary.
The fajitas taste flat
Check salt first, then add fresh lime off the heat. A small amount of acidity often gives the spices definition without needing to double them.
FAQ
Yes. Mix the dry spices and store them in a tightly closed, labeled jar away from heat and sunlight. This makes the meal faster to assemble; stir the jar before measuring because fine powders can settle.
Yes, but thaw it safely in the refrigerator first, or use an approved cold-water thawing method and cook immediately afterward. Do not try to cook frozen, clumped strips with the 20-minute timing; they cook unevenly.
Check the center of the thickest strip with a food thermometer. The required temperature is 74°C / 165°F; color and clear juices are not reliable substitutes.
No, if you use a mild chili seasoning blend. The recipe has a warm, smoky flavor with adjustable heat. Pure ground hot chili can be much stronger, so start with a smaller quantity.
Yes. Slice peppers and onions the day before, store them chilled in a covered container and dry them if condensation develops. Keep cut vegetables separate from raw chicken.
Absolutely. The skillet filling works with rice, roasted potatoes, greens or black beans. Tortillas are a serving choice, not a required part of the cooking method.
The timing and browning depend on the amount of food relative to the pan's surface area. Doubling the ingredients without increasing the pan size requires batches; simply doubling the quantities while keeping the same method would give misleading results.
Editorial note: This is a carefully developed instructional recipe, not a claim of a physically tested preparation. Oven and stove performance, ingredient size and pan material vary.
Nutrition
Nutrition information is not available for this recipe yet.
Reviews
There are no reviews for this recipe yet.
TastyFlavors Team
The editorial team behind TastyFlavors, sharing recipes, techniques and inspiration for everyday cooking.