
Cooking Tips
How to Caramelize Onions Perfectly: Heat, Timing and Flavor
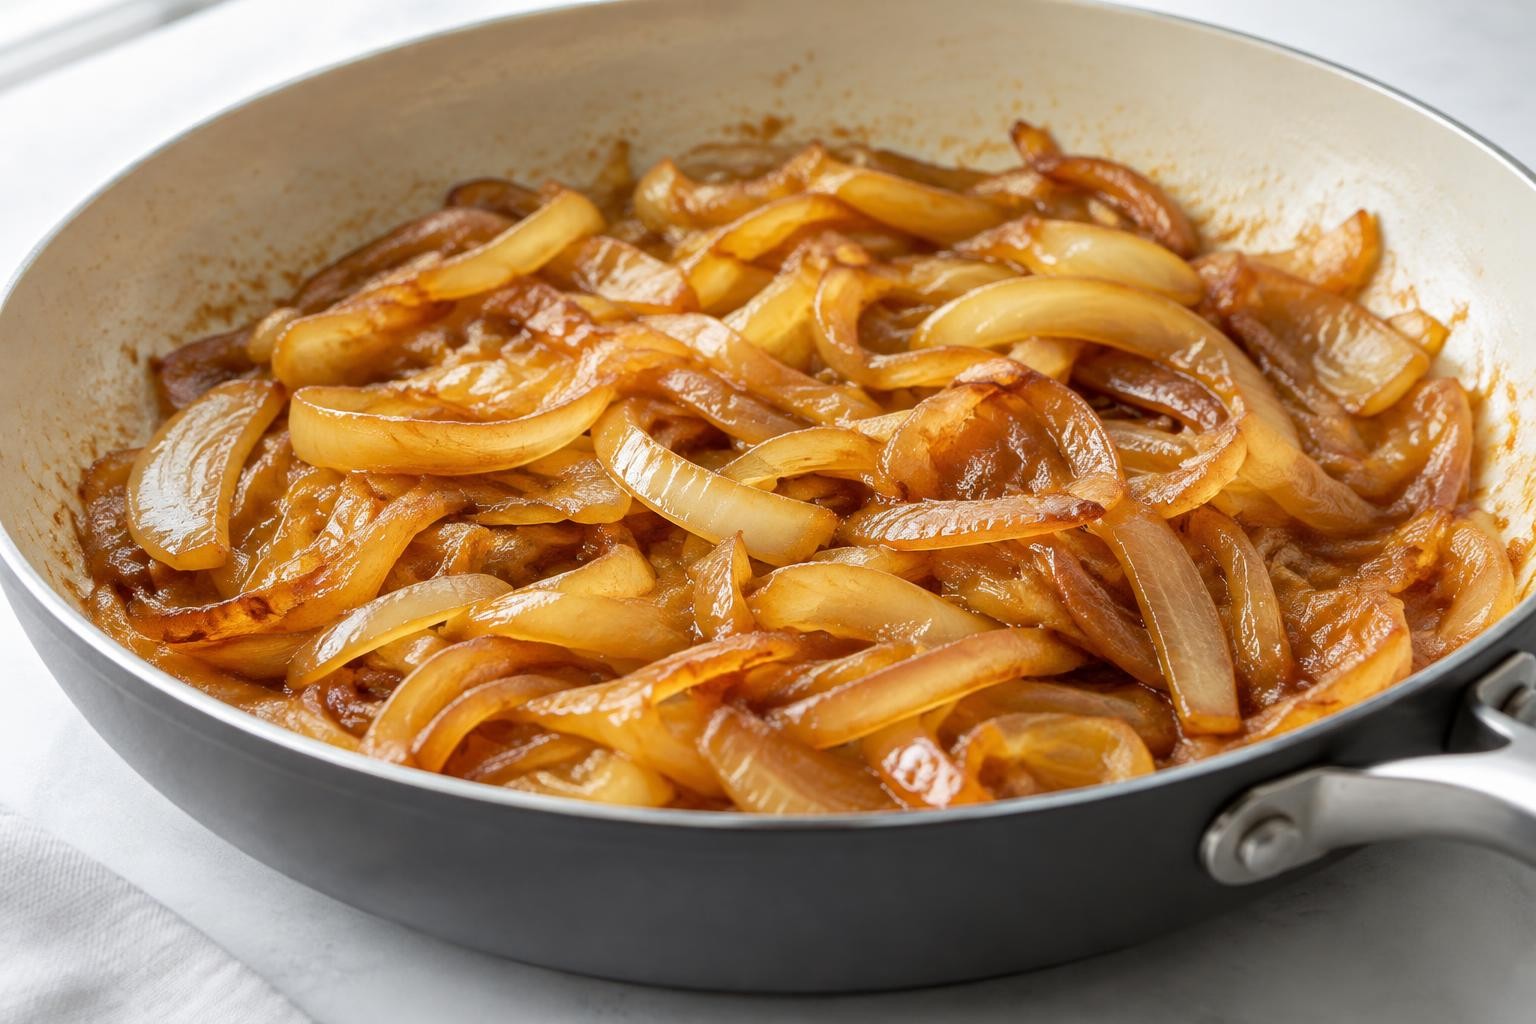
Caramelized onions reward patience rather than complicated ingredients. Given enough time over moderate heat, ordinary onions become soft, deeply golden and intensely savory-sweet, with a rich flavor that complements burgers, soups, sandwiches, tarts and roasted vegetables. But there is a big difference between genuinely caramelized onions and onions that are simply browned on the outside while remaining sharp and crunchy inside.
The key is to let the onions lose much of their water before encouraging darker browning. The first part of the process is mostly softening and evaporation; the deeper color develops gradually after the slices collapse. A small amount of water can rescue flavorful browned bits from the pan without washing away the taste.
The most useful expectation: beautifully caramelized onions often take 35–60 minutes, sometimes longer, depending on the amount, pan and heat. Recipes that promise evenly dark, jammy onions in five minutes usually describe quick sautéing, not a complete caramelization.
What actually happens to onions in the pan?
Raw onions contain a great deal of water, along with natural sugars and compounds responsible for their sharp aroma. Heating them softens their structure and releases moisture. At first, the pan is doing more steaming than browning. This is why onions may look almost unchanged for several minutes even when the process is working.
As water evaporates and the onions become concentrated, the pan temperature can rise above the boiling point of water in drier contact areas. Browning reactions then create complex roasted and sweet aromas. Some color comes from caramelization of sugars; much of the savory complexity may also involve Maillard reactions between natural sugars and amino compounds. It is more accurate to think of this as a gradual mixture of softening, evaporation and browning rather than one instant chemical switch.
A darker color brings stronger flavor, but only up to a point. Rich brown onions taste sweet and deeply savory; blackened flecks can taste bitter. The goal is slow, controlled development rather than constant intense heat.
Choose your onion
Yellow onions are a practical everyday choice because they have enough sweetness and a balanced savory flavor. White onions also work and may taste a little sharper at the beginning. Red onions caramelize, too, but the finished color may be more reddish-brown. Sweet onions can become deliciously mellow, although their greater moisture content may lengthen the evaporation phase.
For a predictable home-cooking batch, use about 500 g of onions (roughly 3 medium onions) in a 26–30 cm skillet. Larger batches require more cooking time or a larger pan; the aim is to give the slices enough space to release steam.
You do not need added sugar, balsamic vinegar or baking soda. Those ingredients create different results and can be useful in specific dishes, but they are not prerequisites for well-developed onion flavor.
Equipment and ingredients
What you need
- 500 g yellow onions, peeled and sliced about 3–4 mm thick
- 1 tbsp olive oil
- 1 tbsp unsalted butter, optional
- 1/2 tsp fine salt, divided, plus more to taste
- 2–4 tbsp water, as needed for deglazing
- 1 heavy-bottomed 26–30 cm skillet or sauté pan
- 1 wooden spoon or silicone spatula
Pan note: a stainless-steel or well-seasoned cast-iron pan makes browned residue easy to see and manage. A nonstick pan can still work but may produce less fond. Avoid a very thin pan with aggressive hot spots, because it can scorch isolated areas before the rest of the onions soften.
Technique: caramelize onions step by step
Prepare and begin the softening phase
- Peel the onions, remove any dry or damaged layers and cut them in half from root to top. Trim the ends and remove the tough root base.
- Slice each half into pieces around 3–4 mm thick. Consistent thickness matters more than the exact shape: paper-thin slices burn easily, while large wedges take much longer to soften.
- Put the skillet over medium heat and add the olive oil, together with butter if using. Allow the fat to warm until it flows easily but does not smoke.
- Add the onions and toss until coated. Sprinkle over roughly half the salt; salt helps draw moisture to the surface during the initial softening.
- Cook over medium heat for about 8–12 minutes, stirring every minute or two. The onions should begin to look glossy, bend easily and lose some volume.
- If the pan hisses violently and the onions darken immediately, reduce the heat. Rapid browning while the interiors remain firm is a sign of excessive heat, not progress.
Evaporate moisture without rushing
- Reduce the heat to medium-low once the onions are visibly softened. Keep the pan uncovered so the moisture can escape rather than condense back onto the slices.
- Continue cooking for another 10–15 minutes, stirring occasionally and scraping the base to prevent sticking. The onions will shrink and change from opaque white to pale golden.
- Observe the sound of the pan. Loud wet sizzling usually means water is still evaporating; a quieter, softer sizzle often develops as the pan becomes drier.
- If you see localized dark patches forming on the metal, add 1 tablespoon of water and scrape those spots into the onions. This loosens flavorful residue before it turns bitter.
- Avoid adding large amounts of liquid all at once. The aim is to dissolve browned patches, not to boil the onions in a sauce.
- Taste a small cooled strand. It should be soft and noticeably less sharp than raw onion, but it will not yet have the full depth of the finished batch.
Build deep golden-brown flavor
- Keep cooking on medium-low heat, stirring more frequently as the onion mass becomes smaller and drier. The color should deepen slowly rather than jumping from gold to black.
- Spread the onions into an even layer between stirs. Short periods of still contact with the pan encourage browning; constant rapid stirring can slow it down.
- Scrape the bottom gently when a thin layer of dark gold appears. If it threatens to catch, add another tablespoon of water and incorporate the loosened residue.
- Continue until the onions become a deep copper-brown color, soft enough to spread with a spoon. For a batch this size, the total elapsed time is often 35–60 minutes.
- Taste again after cooling a strand. You should notice rounded sweetness and savory depth without raw onion bite or burnt bitterness.
- If the onions seem dry and are already the color you want, add a teaspoon of water just to loosen the texture, then let most of it evaporate.
- Turn off the heat and fold in the remaining salt a little at a time. Salt at the end lets you adjust the concentrated flavor more precisely.
- Serve warm or cool the onions promptly and transfer to a clean container. As they cool, they become slightly thicker and easier to spread over toast, sandwiches and other dishes.
Understanding the stages
Stage 1: translucent and soft
The onions lose their crunchy structure and appear glossy. Their aroma becomes less sharp, but the flavor is still onion-forward. At this point they are ideal for the foundation of soups and stews but are not truly caramelized.
Stage 2: pale gold
The slices have lost substantial water, collapsed and begun to stick together. Small golden spots can appear on the pan. This is the transition where attention becomes more important and large, infrequent stirs become riskier.
Stage 3: copper brown
The onions are concentrated, soft and richly aromatic. They may form a loose, jammy mound that leaves some browned residue behind when moved across the skillet. This is a versatile stopping point for burgers and tart fillings.
Stage 4: very dark brown
An intense savory flavor develops, useful for deeply flavored dips and onion soup. But there is little margin before the texture becomes dry and the taste bitter. This stage requires low heat and frequent checks.
The biggest mistakes (and how to fix them)
Using heat that is too high
A high burner gives rapid surface color but often leaves centers undercooked. Reduce to medium-low, add a small spoonful of water and let the onions soften before pursuing more color.
Overcrowding a small pan
When a large mound of onions is packed into a small saucepan, moisture cannot escape efficiently. The onions steam for a long time, then suddenly begin browning in uneven spots. Use a wider pan or work in two batches.
Adding sugar to force the color
Sugar can make the pan brown quickly without fully developing the onions' savory complexity. It can also burn. Use time and steady heat first, and reserve sugar for dishes in which it serves a deliberate flavor purpose.
Adding baking soda
Baking soda speeds softening by changing the onions' pH, but it can leave a mushy texture and an off flavor when overused. It is not recommended for this foundational method.
Stirring constantly
The pan needs a little quiet contact time to brown the onions. Stir enough to prevent scorching, then let them settle briefly. The right rhythm increases as they get darker.
Walking away at the end
The last 10–15 minutes can change quickly because far less water remains. Stay near the stove, especially once the onions reach a dark gold tone.
Water versus stock versus wine
Plain water is the best neutral deglazing liquid for learning the technique because it dissolves stuck-on browned bits without changing the flavor. Vegetable stock contributes savoriness but can also add salt and may cloud the pure onion taste. Wine introduces acidity and aroma and is best chosen when the final dish benefits from it.
Start with a tablespoon of water when you need it rather than deglazing on a schedule. Some pans develop plenty of residue; others barely need liquid. If you add more than a few tablespoons at once, you move temporarily back into a simmering phase.
Do you need butter?
Butter contributes a warm dairy flavor, but it contains milk solids that can brown quickly. Combining a small amount with oil gives a pleasant result without depending exclusively on butter. Olive oil alone works well and makes the finished onions suitable for a vegan meal.
If the skillet smells of scorched butter early in cooking, lower the heat and add a little water; do not keep increasing the burner in the hope that the onions will catch up.
Ways to use caramelized onions
- Spread over a burger or veggie burger with sharp cheese or pickles.
- Fold through a yogurt or sour-cream dip with black pepper and fresh herbs.
- Spoon into a grilled-cheese sandwich.
- Add to a savory tart with goat cheese or roasted vegetables.
- Stir into mashed potatoes or lentils.
- Finish mushroom pasta or a grain bowl.
- Use as a flavorful base for onion soup.
A little often goes a long way. Since the onions shrink substantially, the final volume will be much smaller than the raw pile you started with.
Storage and food safety
Refrigerate: cool promptly and place in a shallow, clean, airtight container. Refrigerate within 2 hours and keep at 4°C / 40°F or below. For practical home use, plan to eat within 3–4 days.
Freeze: portion the cooled onions into small freezer-safe containers or flattened bags. Freeze for best eating quality over approximately 2–3 months, though the exact time depends on packaging and freezer performance. Thaw in the refrigerator.
Reheat: warm gently in a skillet with a spoonful of water, stirring until hot throughout. Do not leave cooked onions sitting at room temperature for extended periods.
FAQ
Usually 35–60 minutes for a modest batch, and sometimes more. The pan's width, burner power, initial water content and desired color all affect the duration.
Yes. Their color will differ, but the same slow approach works. Red onions can produce attractive reddish-brown strands with a slightly different flavor profile.
You can soften and brown onions with small additions of water in a suitable pan, but controlling sticking is more difficult and the texture differs. For this technique, a little oil makes results more predictable.
No. Onions contain their own sugars. Added sugar can speed browning of the pan but is not necessary for the deep flavor of properly cooked onions.
The heat may have been too high or the dark residue may have scorched. Lower the burner and deglaze as needed. If the batch has a strong burnt taste throughout, it is difficult to repair.
Keeping the lid on traps steam and slows evaporation. An occasional brief cover can help very firm onions soften, but the lid should come off for most of the caramelization phase.
Yes, but the result and cooking time differ significantly; the cooker retains more moisture and may produce softer onions with less direct browning. This stovetop method is more predictable for learning color control.
Editorial note: This is a culinary technique guide based on cooking principles, not a claim that a particular batch was physically tested.
TastyFlavors Team
The editorial team behind TastyFlavors, sharing recipes, techniques and inspiration for everyday cooking.