
Recipes
Soft Homemade Cinnamon Rolls with Cream Cheese Glaze
Prep
35 min active
Cook
25–30 min
Total
about 3 h including rising
Servings
12
Difficulty
Medium
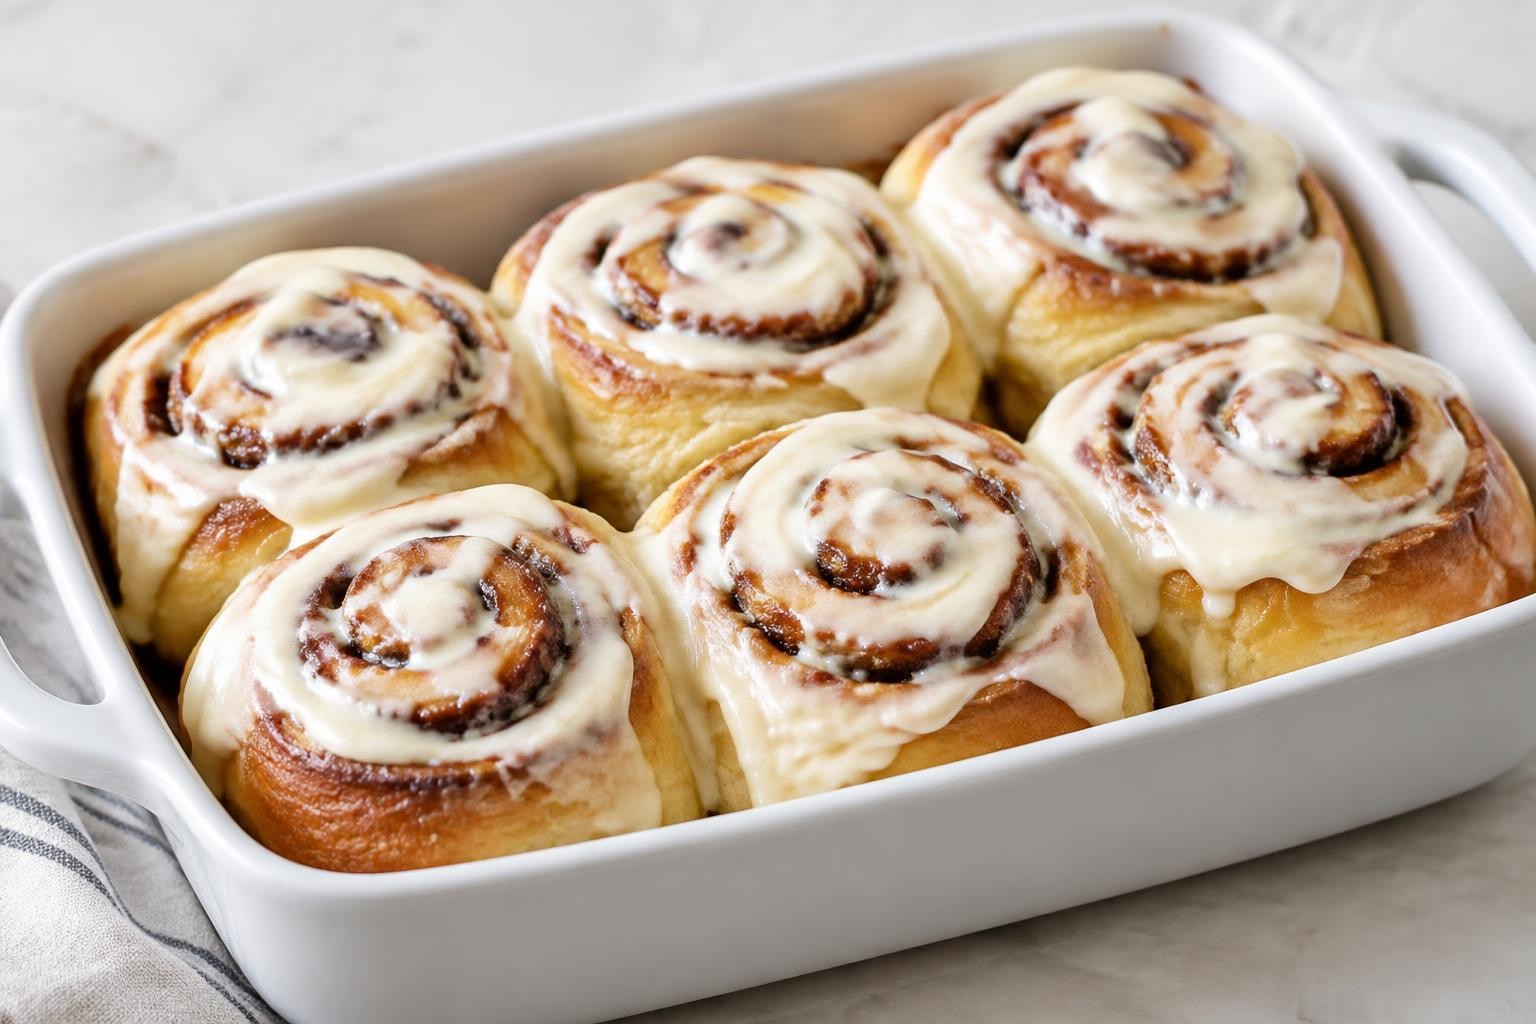
A good homemade cinnamon roll has three distinct layers of pleasure: a tender, pull-apart bread, a spiral of buttery cinnamon sugar and a creamy finish that melts into the warm surface. Too often, homemade rolls turn out dense because the dough is overloaded with flour or rushed through its rise. This recipe explains how to manage both the dough and the filling so the rolls remain soft without becoming raw in the middle.
The dough is a lightly enriched yeast bread made with milk, egg, butter and a moderate amount of sugar. Enriched doughs often rise more slowly than plain bread dough because fat and sugar affect yeast activity and gluten development. Give the dough time to become puffy rather than forcing it to obey a fixed timer.
The recipe is intended for a 23 x 33 cm (9 x 13 in) baking dish and makes 12 rolls. Because pan size, dough thickness and rising time are linked, the automatic serving adjustment is deliberately disabled. You can change the batch size manually, but you must also adjust the pan and baking conditions.
Recipe details
- Prep
- 35 min active
- Cook
- 25–30 min
- Total
- about 3 h including rising
- Servings
- 12
- Difficulty
- Medium
- Category
- Recipes
- Diet
- Vegetarian (lacto-ovo)
- Portion size
- 1 roll
Ingredients
Soft dough
Cinnamon filling
Cream cheese glaze
Method
Mix and knead the dough
Step 1: Measure the ingredients accurately. Weigh the flour rather than packing it into cups; an extra handful or two can change the softness of the rolls.
Step 2: Warm the milk to about 35–40°C / 95–104°F. It should be comfortably lukewarm. If it is very hot, let it cool before adding yeast.
Step 3: Stir the flour, yeast, sugar and salt together in a large mixing bowl. Keep salt and yeast distributed through the flour rather than dumping concentrated piles in one spot.
Step 4: Add the milk, egg, cooled melted butter and vanilla. Mix with a sturdy spoon or mixer dough hook until no dry flour remains.
Step 5: Let the shaggy dough rest for 10 minutes. This pause allows the flour to absorb moisture, often making the dough less sticky without extra flour.
Step 6: Knead for 8–12 minutes by hand, or about 6–8 minutes in a stand mixer on low-medium speed. The dough should become smoother, elastic and slightly tacky rather than runny.
Step 7: If the dough is extremely wet after several minutes of kneading, add flour only **1 tablespoon at a time**. Stop as soon as it can be handled; do not aim for a hard, dry dough.
Step 8: Transfer to a lightly oiled bowl, cover and let rise in a draft-free spot until about doubled in volume, usually 60–90 minutes. Cooler rooms may take longer.
Prepare the filling and shape
Step 9: While the dough rises, mix the brown sugar, cinnamon and pinch of salt in a small bowl. Keep the filling butter soft and spreadable rather than melted.
Step 10: Grease a 23 x 33 cm (9 x 13 in) baking dish lightly with butter or neutral oil. Line with parchment if you prefer easier removal.
Step 11: Place the risen dough on a lightly floured surface and press out the large gas bubbles gently. Roll it into an approximately **30 x 45 cm (12 x 18 in)** rectangle with an even thickness.
Step 12: Spread the 60 g of soft butter across the dough, leaving about 1 cm clear along one long edge for sealing.
Step 13: Scatter the cinnamon-sugar mixture evenly over the butter and press lightly so the filling adheres to the surface.
Step 14: Starting from the opposite long edge, roll the dough into a snug log without stretching it aggressively. Pinch the seam closed.
Step 15: Cut the log into 12 equal pieces, about 3.75 cm thick, using a sharp knife or clean unflavored dental floss. Cut straight down rather than crushing the spirals.
Step 16: Arrange the rolls in the prepared dish, leaving a little space between them. Cover loosely and let rise again for 35–60 minutes, until noticeably puffy and the gaps have mostly narrowed.
Bake and glaze
Step 17: Near the end of the second rise, preheat the oven to **180°C / 350°F conventional**, or around **165–170°C / 330–340°F fan-assisted**. Place a rack in the middle.
Step 18: Bake the rolls for approximately 25–30 minutes, until the tops are lightly golden and the bread at the center is cooked. If the surface browns too fast, loosely tent with foil. Aim for about 88–93°C / 190–200°F in the bread part, not in the sugary filling.
Step 19: While the rolls bake, beat softened cream cheese, sifted powdered sugar, milk, vanilla and salt until smooth. Add another teaspoon of milk only if necessary for a spreadable glaze.
Step 20: Let the rolls rest for 8–10 minutes after baking. Spread the glaze over the warm, not blazing-hot rolls so it softens slightly rather than disappearing completely. Serve while the spirals are tender.
Tips
- Use a scale. Flour is the ingredient most often overmeasured in sweet breads.
- Keep the milk lukewarm. Very hot milk can harm yeast, while cold milk slows fermentation.
- Don't rush the first rise. Fat-rich dough needs time to become light.
- Stop adding flour early. A soft dough can feel a little sticky and still produce excellent rolls.
- Use softened filling butter. Melted butter runs out during shaping, leaving uneven cinnamon pockets.
- Roll evenly. An uneven rectangle creates rolls with different sizes and baking times.
- Cut without crushing. Unflavored floss or a sharp serrated knife helps preserve the spirals.
- Proof the shaped rolls. The second rise determines whether the final texture is airy or tight.
- Bake by doneness, not color alone. Brown sugar filling can make the center appear darker while the bread remains underbaked.
- Glaze after a short rest. Very hot rolls melt the cream cheese topping into a thin liquid.
Variations
Orange cinnamon rolls
Add finely grated zest of one orange to the filling and replace the vanilla in the glaze with a small amount of orange zest. Avoid adding much juice to the dough, which changes the hydration.
Cardamom cinnamon rolls
Add 1/2 teaspoon ground cardamom to the cinnamon-sugar filling for an aromatic, Nordic-inspired twist. Start with less if your spice is especially fresh and potent.
Raisin and cinnamon rolls
Scatter 60 g raisins over the filling before rolling. If the raisins are very dry, soak briefly in warm water and drain thoroughly; excess water can create gaps in the spirals.
Without cream cheese glaze
Mix 80 g powdered sugar with 1–2 tablespoons milk and a touch of vanilla. Drizzle only once the rolls are warm rather than hot. This topping is sweeter and less tangy.
Make-ahead refrigeration
After shaping, cover the pan and refrigerate overnight. The next morning let the rolls stand at room temperature until visibly puffy, which may take 60–120 minutes depending on room temperature, and bake as directed. Never use elapsed time alone to judge proofing.
What makes cinnamon rolls soft?
Softness starts with the amount of flour and how the dough is kneaded. Adding extra flour every time the dough sticks can turn a supple mixture into a stiff bread. You need a dough that is smooth, slightly tacky and elastic, not dusty or dry. A short rest before kneading can make it easier to handle because the flour has time to absorb the milk.
The first rise lets the dough develop gas and expand. The second rise, after shaping, matters just as much: without it, the spirals can bake up tight and heavy. A warm but not hot environment supports fermentation. Too much heat can weaken yeast or melt the filling before the rolls enter the oven.
Finally, do not bake until every visible swirl is deeply browned. The tops should be lightly golden and the center rolls fully baked. A quick check with a thermometer is helpful: the bread portion near the center should reach roughly 88–93°C / 190–200°F. Avoid probing a pocket of cinnamon filling, which can give misleading readings.
Understanding dough texture
The finished dough should feel slightly tacky when touched but should not pour or slump like cake batter. It should pull away from the mixing bowl in a cohesive mass after sufficient kneading. If it tears immediately when stretched, it may need more kneading or a short rest. If it is hard and resistant, too much flour may have been added.
A reliable visual sign of the first rise is significant expansion, not a precise number of minutes. After the second rise, the rolls should look puffed and gently press back when touched. Dough that springs back instantly may need more time; dough that collapses completely may be overproofed.
Serving suggestions
These rolls are ideal for brunch, holiday breakfast or an afternoon coffee. Their sweetness pairs well with unsweetened tea, black coffee or fresh fruit. Because the filling and glaze are rich, smaller portions often feel satisfying.
For presentation, serve them directly from the baking dish so the tender sides stay close together. If you need tidy slices, lift portions with a broad spatula rather than pulling harshly on the spirals.
Storage and reheating
Refrigerate glazed rolls: because the frosting contains cream cheese, refrigerate leftovers within 2 hours in an airtight container at 4°C / 40°F or below. Use within 3–4 days for good quality.
Freeze: unglazed baked rolls freeze well when wrapped individually and protected from freezer air. Aim to use within about 2 months for best flavor and texture. Thaw in the refrigerator and add fresh glaze after warming.
Reheat: warm a roll briefly in a low oven or microwave until soft and warmed through. Avoid extended heating, which dries the bread and can cause the cream-cheese topping to separate.
Troubleshooting
The rolls are dense
The dough may contain too much flour, have been underkneaded or not allowed to rise sufficiently. Check texture and expansion rather than following the clock blindly.
The filling leaked out
The butter may have been melted, the dough too warm or the log rolled too loosely. Softened butter and a snug roll help keep filling inside.
The centers look raw
The baking dish may be crowded with underproofed, thick rolls or the oven temperature inaccurate. Give the dough enough rise and verify the bread portion is baked before glazing.
The tops browned too quickly
Some ovens run hot or have strong upper heat. Cover loosely with foil once they are golden and allow the centers to finish.
The glaze is runny
The cheese or butter may be overly warm, or too much milk may have been added. Chill briefly or add a small amount of sifted powdered sugar.
FAQ
Yes, but bread flour absorbs water differently and can make the crumb slightly chewier. Start with the same weight and judge the dough texture rather than adding large amounts of extra flour.
Absolutely. Mix with a spoon and knead by hand on a lightly floured surface. It takes more time and effort but works well.
Usually yes, but follow its package instructions and adjust the amount if recommended. The rising time may vary. The dough should be judged by volume and puffiness.
You can freeze shaped rolls, but yeast activity and proofing after thawing may be less predictable. For a simpler and more reliable method, freeze baked unglazed rolls.
The dough may have been fermented too warm or too long, or the yeast amount altered. Measure correctly and stop each rise when the dough is ready rather than letting it collapse.
No. A simple powdered-sugar glaze works, or you can serve the rolls plain. Cream cheese adds tang and balances the cinnamon sugar.
The shaping geometry, cut thickness, baking dish dimensions and rise all interact. Doubling the dough without changing the equipment can produce raw centers or uneven baking.
Editorial note: This method is instructional and does not claim a physically tested batch. Fermentation depends on yeast freshness, ingredient temperature and room conditions.
Nutrition
Nutrition information is not available for this recipe yet.
Reviews
There are no reviews for this recipe yet.
TastyFlavors Team
The editorial team behind TastyFlavors, sharing recipes, techniques and inspiration for everyday cooking.